In this guide we will show you how to prevnet Windows 10’s automatic-repair from running automatically.

Microsoft added automatic repair to Windows 10 as a feature that troubleshoots and tries to fix common problems that may be preventing system from loading correctly.
If your computer fails to start, two times in row, the third boot attempt will end up in triggering the windows self-repair mechanism. Basically, during that time your Windows 10 will try to diagnose all possible problems.
However, if you are an experienced user, software developer (hello boot drivers!) or your automatic recovery is now stuck in never ending loop you can try to disable this mechanism manually.
How to disable automatic repair on Windows 10
To disable automatic repair mechanism of Windows 10, follow the steps below:

bcdedit command- Open Start (or use Windows search field).
- Search for Command Prompt or type cmd in the Windows search field, right-click on the console application (cmd), and select Run as administrator.
- Type the following command and press Enter:
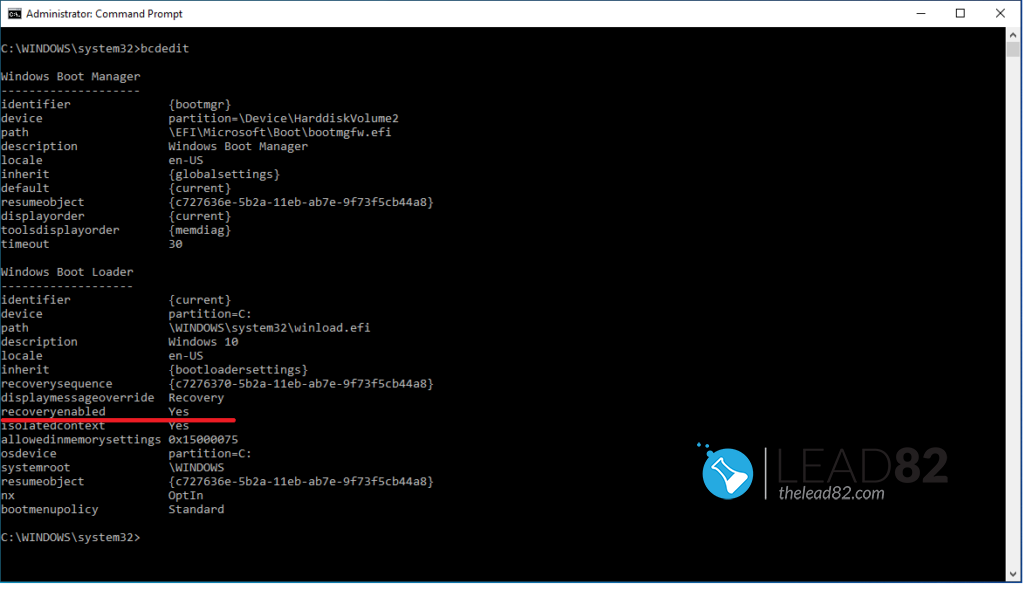
bcdedit - Look for reoveryenabled setting under the “Windows Boot Loader” section. If enabled the value of reoveryenabled should be Yes.
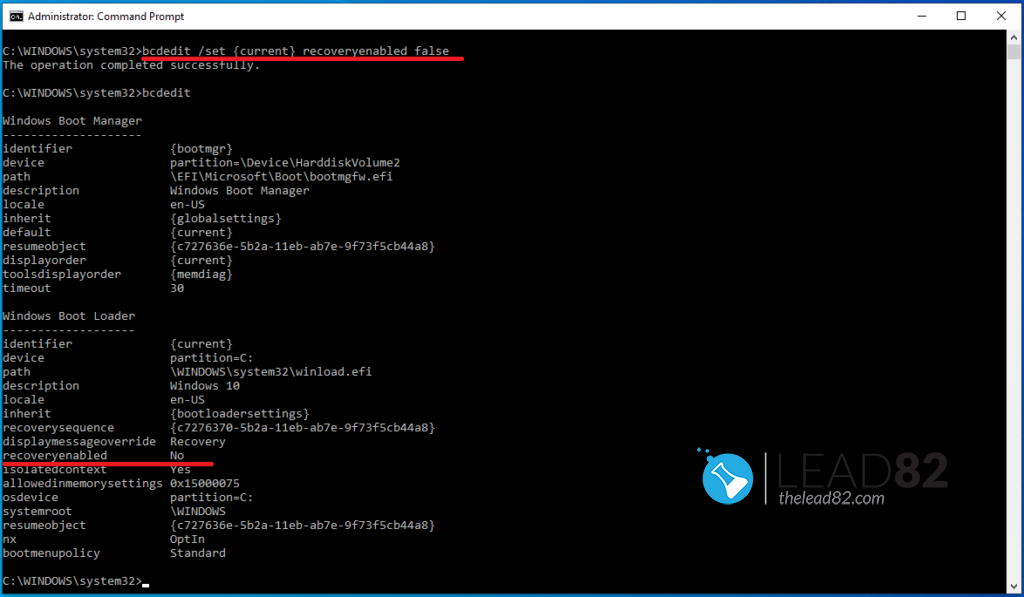
- Now to disable automatic repair, type following command and press enter:
bcdedit /set {current} recoveryenabled false - Done, you can see result in the image below.

Once you have made it through the presented steps, the diagnostic and repair feature will no longer run automatically.
How to enable automatic repair on Windows 10
If the automatic repair feature is disabled, you can re-enable by using following steps. This process is very similar to the previously presented one.
- Open Start (or use Windows search field).
- Search for Command Prompt or type cmd in the Windows search field, right-click on the console application (cmd), and select Run as administrator.
- Type:
bcdeditand press ENTER - Look for reoveryenabled setting under the “Windows Boot Loader” section. If automatic repair feature is disabled the value of reoveryenabled should be No.
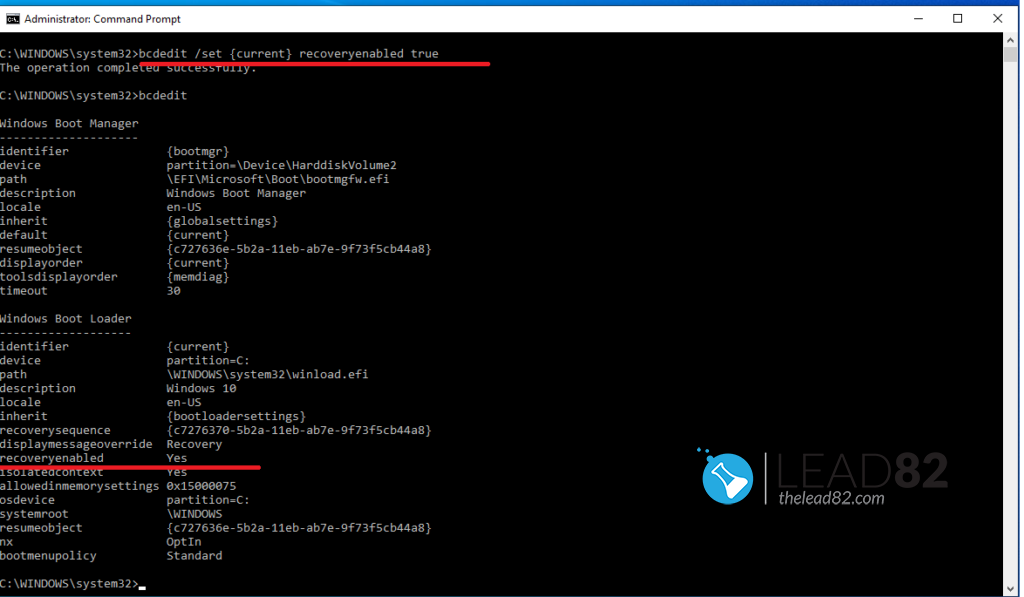
- Now to enable automatic repair feature, type following command and press enter:
bcdedit /set {current} recoveryenabled true - All done, check the image below to see the result.

Once you are done with the steps above the automatic recovery process will be enabled again. Now, if you will experience Windows booting problems, after two unsuccessful attempts you system will run the automatic repair mechanism automatically.